Are you tired of the high energy bills that come with keeping your outdoor lights on all night? Or maybe you’re looking for ways to reduce your carbon footprint and live a more sustainable lifestyle. Whatever your reason may be, you’ll be happy to know that there are many innovative ways to power your outdoor lights without relying on electricity.
From solar-powered lights to candles and fire pits, there are plenty of options to choose from. In this article, we’ll explore some of the most creative and sustainable ways to keep your outdoor space illuminated, so you can enjoy those beautiful summer nights without breaking the bank or harming the environment. Get ready to unplug and glow with these innovative ways to power outdoor lights without electricity!
1. Solar Power
Solar power has become increasingly popular as a viable energy source for outdoor lighting. This non-polluting, renewable energy source is the perfect way to provide light to outdoor areas. It is easy to install, and efficient and cost-effective in the long run.
Let’s look more closely at how solar power can be used to power outdoor lights without electricity.
Advantages and Disadvantages
The use of solar energy to power it has a number of advantages and disadvantages. Solar power is an environmentally friendly option, as it does not produce any emissions or require the burning of fossil fuels.
This can help reduce your carbon footprint and protect our planet from further damage due to climate change. They also require minimal upkeep, since they don’t need to be connected to utility lines or require additional wiring.
On the other hand, there are some drawbacks to using solar energy for outdoor lighting. For one thing, it is dependent on sunlight in order to reach full charging potential, so cloudy days may result in a reduced charge for your lights.
The initial cost of purchasing a solar-powered system may also be more expensive than traditional systems which use electricity from the grid, though you can recoup some of that cost through savings on utility bills over time.
In addition, you should make sure that your chosen model has sufficient battery life and charge capacity in order to light up adequately at night while still having enough subtle lighting effects during the daytime if desired.
How to Install
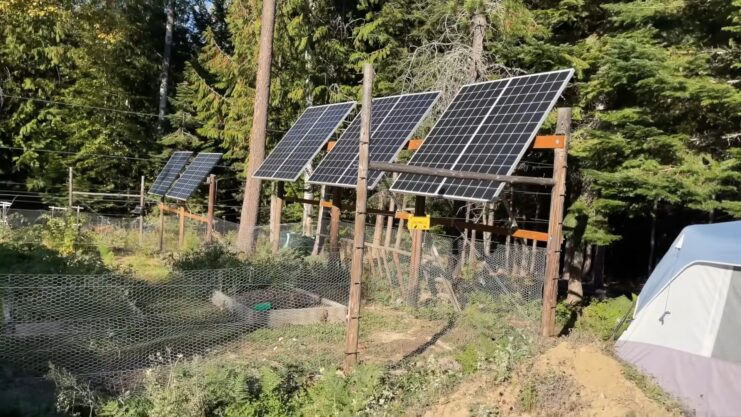
This is typically a straightforward process, but the exact details will vary depending on the location and the type of system you choose. Keep in mind that you will need access to sunlight on a regular basis for your lights to stay powered. This guide will outline the basic steps for setting up a solar-powered light system.
- Start by selecting an appropriate location for your solar panel or panels. Make sure that it has enough direct sunlight throughout the day and sufficient cover from the elements, like wind and snow.
- Secure your panel or panels to a frame and attach mounting wedges where applicable.
- According to your specifications, assemble your wiring into bundles with wire nuts if necessary and use zip ties to secure them together. Mount your wiring along walls, posts, or any other surfaces using suitable adhesives such as sticky paperback tape or conduit mounting clips as needed. Connect these wires to junction boxes at their respective ends if they are longer than 3 meters (or 10 feet). Weatherproof the connection with silicone caulk or shrink tubing before attaching them to junction boxes where applicable.
- Install light fixtures (such as floodlights) near areas that require illumination and connect them to the system’s controllers via suitable cables which may be ordered separately from your solar power system provider based on your requirements. Make sure you also protect these fixtures from potential water damage with waterproof covers as needed, especially if they are mounted in exposed locations such as rooftops or tree branches! If motion sensors are necessary, now’s also the time to install them according to their provided instructions for setup
- Ensure all connections are secure before turning on the power supply via the switch located near each fixture’s power outlet (if present). Check all components of the system including wiring bundles, junction boxes, lights & sensors against manufacturer instructions– any errors here can lead to serious problems down line so be cautious!
2. DIY Lighting

This is a great way to create unique and personalized outdoor lighting solutions without relying on electricity. There are many creative ways to repurpose old items or use recycled materials to create one-of-a-kind lighting fixtures that add character and charm to your outdoor space.
One simple DIY lighting solution is to use mason jars as lanterns. Simply place a small candle or battery-operated LED light inside the jar and hang it from a tree or porch using a piece of twine or wire. Mason jar lanterns can be customized with paint or decoupage to add a personal touch.
Another fun project is to create a chandelier using tree branches. Find several branches of varying lengths and attach them to a central point, such as a metal hoop or wire basket. Hang tea light candles or LED ones from the branches to create a rustic and whimsical chandelier.
For a more industrial look, consider using old metal pipes and fittings to create a unique lighting fixture. You can attach Edison bulbs to the pipes and hang the fixture from a tree or porch using a heavy-duty chain or rope.
If you have an old birdcage lying around, you can repurpose it as a hanging lantern. Simply remove the bottom of the cage and attach a light bulb and cord kit. Hang the birdcage lantern from a tree or porch for a vintage-inspired lighting solution.
Finally, consider using natural materials to create DIY lighting fixtures. You can make a simple yet elegant pendant light using a woven basket or bamboo lantern. Fill the basket or lantern with fairy lights or battery-operated LED lights for a soft and warm glow.
3. Battery Power
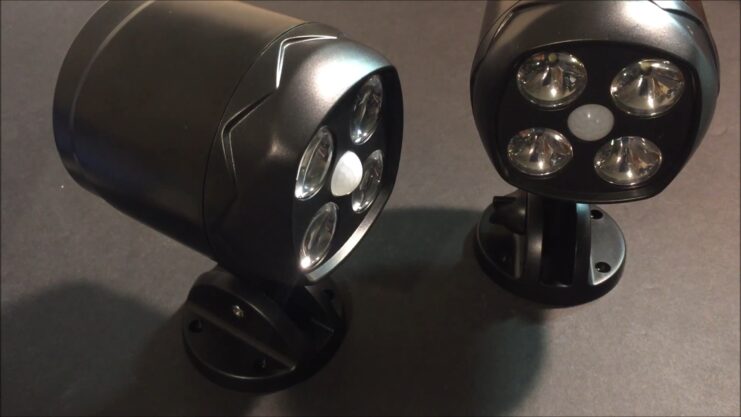
Many homeowners today want to be able to light up the exterior of their homes without having to use electricity. One of the easiest ways to do this is to use batteries. There are many advantages to using battery power for lighting, such as the fact that it runs silently and is often more cost-effective than electricity.
Let’s explore the different types of batteries that can be used to power outdoor lights.
Advantages and Disadvantages
When you don’t have access to an electrical outlet or when you want to enjoy temporary lighting outdoors, battery power is one option. Batteries are convenient because they are portable, and provide illumination without the need for setup or even permanent fixtures.
While useful in certain situations, batteries have a few advantages and disadvantages that need to be taken into consideration when selecting outdoor lighting.
Advantages:
- Battery power is convenient and easy to use — it requires no special wiring or installation.
- This type of lighting is portable so it can be used in areas where there’s no electricity available.
- Batteries can be used in any weather conditions so they provide a reliable option even during power outages or extreme temperatures.
Disadvantages:
- Batteries can be expensive and the cost of replacing them regularly can add up over time.
- Batteries require regular maintenance because lights must be turned off and on manually, which adds another layer of complexity to the process.
- The lifespan of a battery depends on its size — some may last for weeks while others may only last for hours, depending on usage and other factors.
How to Install
If you’d like to light up your outdoor space without dealing with wiring, batteries are an easy option. Batteries offer several advantages. In addition to being simpler to install than wired lighting, they are also more flexible and can be placed almost anywhere in your yard or garden.
Installing them is a straightforward process that requires minimal materials and time. Here’s how to get started:
- Select an area where the light will be mounted and remove any obstruction that may prevent a secure fit.
- Determine the type of fixtures you will use (i.e., wall mount, post mount, pathway lights). Each type comes with a different mounting procedure and hardware requirements, so make sure you have the right kit for your chosen fixture(s).
- Use the proper mechanism (often provided) to securely attach the fixtures to their designated location(s). After securing all hardware, ensure that the lights are mounted securely enough not to move or budge after installation is complete.
- Insert pre-charged batteries into the light’s dedicated slots according to their given polarity (make sure negative goes into negative slots and positive into positive) then screw tight on both ends depending on your lighting’s model design specification.
- Once finished, turn on each individual light manually or activate an electric switch connected depending on model design specification as well – this should configure all 90+ hours of power supply if newly purchased batteries are installed correctly!
You should take precautions when handling any electrical device; make sure there is no water present near metallic components during installation in order to protect against shock hazards due to water & electricity mixing contact together while installing/uninstalling/operating them at any given time.
4. Wind Power
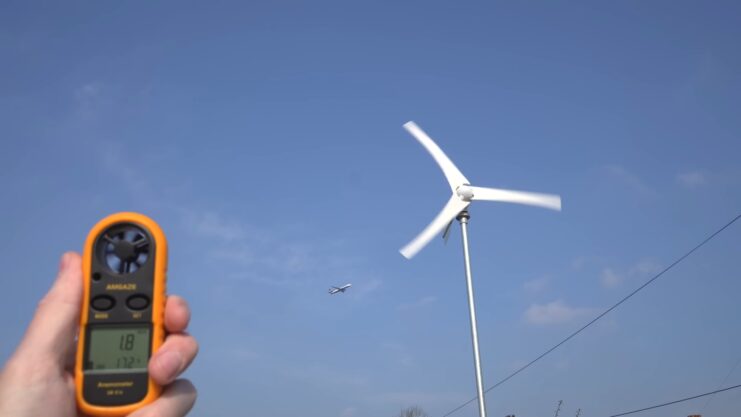
Wind power is one of the most popular ways to power outdoor lights without electricity. It utilizes a turbine to generate electricity from the wind, thereby eliminating the need for electrical wiring and power from the grid. This type of power is cost-effective and eco-friendly, making it an ideal choice for those wanting to power their outdoor lights without having to rely on traditional electricity.
Let’s take a look at some of the pros and cons of using wind power for your outdoor lighting needs.
Advantages and Disadvantages
Wind-powered outdoor lights, also known as wind turbines or micro-wind turbines, are a viable alternative to traditional electricity-powered lighting solutions. They take advantage of wind power to generate energy and power your outdoor lighting, and they’re relatively easy to install on any home. By using this sustainable energy source instead of electricity, you can reduce your carbon footprint and save money on utility bills.
However, as with any type of renewable energy source, wind power comes with both advantages and disadvantages that you should be aware of before investing in it. Some of the most notable benefits include:
Advantages:
- Low Maintenance Costs: Wind power requires minimal maintenance needs since it runs without additional fuel sources such as gas or diesel generators. This makes the wind turbine a cost-effective solution for powering outdoor lights.
- Efficient Energy Production: Unlike solar panels, wind turbines effectively convert wind into usable energy even when the air is still or light winds are present making them an efficient choice for harnessing renewable energy.
- Durable Construction: Wind propulsion units are built from heavy-duty materials which are designed to last for many years with minimal upkeep required in order to stay in peak operation. This allows them to withstand inclement weather conditions such as storms and high winds that can damage other forms of renewable technology.
Disadvantages:
- High Installation Cost: Compared to other options available for powering outdoor lights such as solar power systems, installation costs for a small wind turbine can be quite high due to a lack of the availability and knowledge of normally needed technicians when putting in onto premises beforehand.
- Noisiness at Night: Wind turbines usually create a humming sound when operating especially at night which may disturb anyone nearby trying to sleep thus potentially making them unsuitable if they are installed close enough next-door homes or other residences due to complaints.
- Needs Regular Cleaning Periods: Even though there may not be any moving parts exposed at the exterior levels, dust or dirt particles need to be wiped off occasionally from the blades in order for their efficiency remains continuously productive over long periods of time without having airborne particles steadily covering up their effectiveness speeds over extended usage.
How to Install
Installing solar-powered or wind-powered outdoor lighting is an environmentally friendly way to provide illumination without resorting to traditional electric sources. Solar and wind-powered lights are available in various types, styles, and strengths, suitable for many home and garden applications.
Solar-powered lights are typically the easiest to install since they don’t require any wiring or external power sources. Generally, all that is required is positioning the lights in the desired location and connecting the included batteries or optional rechargeable battery pack.
Wind-powered outdoor lighting can also be relatively straightforward to install if a consistent breeze is available. Different designs are available depending on the power needs of your system as well as the type of fixture you would like to use.
Most systems will require mounting brackets for attaching posts or rig ports in order to place wind turbines securely in open areas that can access steady or gusts of wind; a strong tower with secure guy wires may also be necessary for larger turbines used for higher wattage lights.
In addition to mounting strategies, some systems will require controllers and inverters for controlling power output from your turbine, as well as batteries for storing energy produced by your turbines.
If you’re planning on powering large-wattage devices such as a significant number of outdoor security floodlights, consider investing in an additional energy storage device such as a bank of deep cycle batteries connected directly to your system output panel that can store excess energy generated by your turbine until it’s needed at night time when gusts may cease and darkness decreases photoelectric cell performance.
5. Bioluminescence: Using Glow-in-the-Dark Plants and Fungi
Glow-in-the-dark plants and fungi are a fascinating and natural way to light up your outdoor space. Bioluminescence is the ability to live organisms to produce light through a chemical reaction, and many plants and fungi possess this unique trait.
One popular example of a bioluminescent plant is the glow-in-the-dark mushroom. These mushrooms emit a soft blue-green glow that can add a magical and otherworldly feel to your outdoor space. There are several species of bioluminescent mushrooms, including the Jack-O’-Lantern mushroom, which can be found in forests across North America.
Another example of a bioluminescent plant is the dinoflagellate, a type of plankton that can create a bioluminescent phenomenon known as a “red tide.” These tiny organisms emit a bright blue light when they are disturbed, making the ocean water glow with beautiful and ethereal light.
To incorporate bioluminescence into your outdoor lighting, you can plant glow-in-the-dark plants or fungi in your garden, or you can use bioluminescent materials to create unique lighting fixtures. For example, you can use bioluminescent algae to create a glowing pond or fountain, or you can use glow-in-the-dark paint to create unique designs on your outdoor walls or furniture.
One of the biggest advantages of using bioluminescent plants and fungi for outdoor lighting is that they are a sustainable and natural option. They do not rely on electricity, and they are a renewable resource that can continue to glow for years with proper care and maintenance.
FAQs
1. Are solar-powered lights bright enough to illuminate my outdoor space?
Yes, they can be just as bright as traditional electric lights. Look for ones with a high lumens rating to ensure they are bright enough for your needs.
2. Can I use candles as a source of outdoor lighting?
Yes, candles are a great option for creating a cozy and intimate atmosphere in your outdoor space. However, be sure to use caution when using candles and never leave them unattended.
3. Can I use wind power to light my outdoor space?
Yes, wind power can be used to generate electricity for it. Look for wind turbines designed for residential use.
4. What are some DIY options for outdoor lighting that don’t require electricity?
DIY options for it include using mason jars, tin cans, and other materials to create unique lighting fixtures.
5. Can I use glow-in-the-dark paint to create outdoor lighting?
Yes, glow-in-the-dark paint can be used to create unique designs on outdoor walls and furniture.
6. Are there any safety considerations when using non-electric sources of outdoor lighting?
Yes, it is important to use caution when using them. Be sure to follow all safety instructions and never leave open flames unattended.
7. How can I make my outdoor lighting more sustainable?
To make it more sustainable, consider using renewable sources of energy, such as solar or wind power, and choose biodegradable or eco-friendly options.
8. Can I use non-electric sources of outdoor lighting year-round?
Yes, they can be used year-round, but some sources may be more practical during certain seasons.
9. How can I choose the best non-electric source of outdoor lighting for my needs?
Consider factors such as brightness, lifespan, sustainability, and safety when choosing the best one for your needs.