Do you know the percentage of people who dispose of their batteries weekly based on the fact that they can’t charge the batteries in series themselves? It is alarmingly high! A lot of people complain of inadequate knowledge of how to charge the batteries themselves some others complain of the complex process involved.
This article sets out to educate you on how to charge two 12-volt batteries in series by employing the simplest of steps and language. Do you really want to get the best productivity out of your battery pack? If yes, then this is the article you need to read.
Things Required for Charging Two 12 Volt Batteries In Series
How to Charge Two 12 Volt Batteries In Series?

STEP 1: Read the specifications of your batteries
You need to be certain that your 12 volts batteries are actually 12 volts before you start charging hence the very first thing to do before charging your batteries is to read up on the exact specification of your batteries, it is usually placed on the sides of the batteries but it could be placed anywhere.
The information box would normally show the amperage and the voltage requirements of the batteries. Once you confirm that your batteries are actually 12 volts then you can proceed to step two.
STEP 2: Arrange the two batteries in the same direction
The next line of action is to arrange for the two 12 volts batteries to be charged in the same direction. This is important when charging your two 12 volts batteries in series, it is usually so arranged for ease of connection. The batteries can be placed side by side with both batteries facing similar directions, as it allows for efficient and easy connection of cables.
STEP 3: Identify the positive and negative terminals of the batteries
Here, you will identify the negative and positive terminals of the two 12-volt batteries. This is important to prevent damaging your batteries. Connecting the wrong terminals together will certainly not help your battery but make it susceptible to being damaged. Identifying the positive and negative terminals of your batteries are very easy, you just need to check the two terminals for the inscription of either POS, P, or + which all means positive terminal.
For the negative terminal, check for NEG, N, or -. The implication of this is that any of the terminals you find either “POS” or “P” or “+” is the positive terminal and where you find either “NEG” or “N” “-“is the negative terminal.
STEP 4: Connect the batteries together
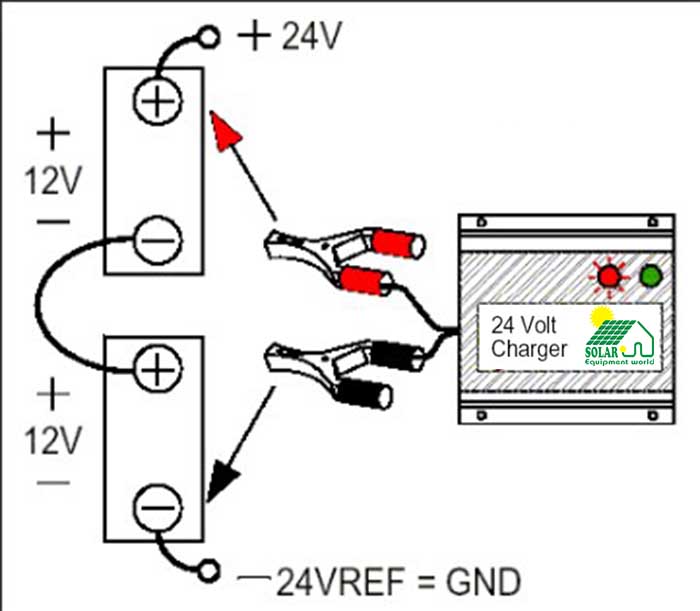
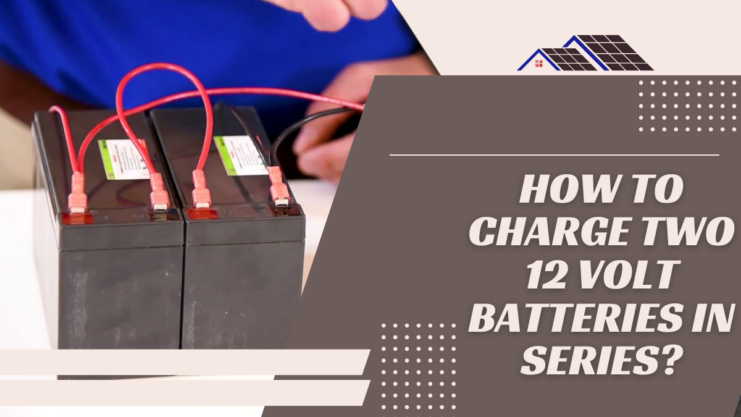
Here, using the knowledge of knowing the negative and positive terminals, making use of the jumper cables, you will connect the two 12-volt batteries together by using the battery cables to connect the negative terminal of battery A to the positive terminal battery of B. Note that ensures the two batteries are properly connected.
STEP 5: Connect the charger clip
At this step, you will connect the charger clip to the battery by clipping the negative charger clip to the negative terminal of battery B and the positive charger clip to the positive terminal of battery A. Ensure that the charger clip is properly clipped to the terminals to avoid it shaking or pulling off during charging.
STEP 6: Place the charger as far from the battery cables as it allows
After connecting the charger to the batteries, for safety, you must ensure that the battery charger is placed at the farthest distance allowed by the cables away from the batteries.
Placing the charger away from the batteries would help to limit the chances of damage to any or all the batteries from any airborne sulfuric acid vapor. It is important to note that at no point before charging, during charging or after charging should the charger be placed directly above or directly beneath the batteries.
STEP 7: Set the Charger to deliver the correct voltage
When batteries are connected together in series, the volts of the batteries become the addition of all the batteries while the amperage remains constant. So, connecting two 12-volt batteries in series makes the output of the two 12-volt batteries to become 24 volts and would require 24 volts to charge efficiently and effectively.
It is pertinent to regulate your battery charger to deliver to your two 12 volts batteries 24 volts. This is very simple to do as all you have to do is to adjust the voltage output selector on the battery charger to 24 volts. The voltage output selector of the battery charger is most times placed conspicuously at the front of the battery charger, you can’t miss it.
STEP 8: Switch on the charger
At this stage, you are ready to start charging your batteries, all you have to do is connect your battery charger to an electrical outlet. Also, ensure that the medium of connecting the battery charger to electricity is a fortified one with three prolonged cords.
The use of an adapter and extension cord should be avoided due to the fact that the type of current flowing through the battery charger is enormous that it can easily burn the adapter and extension cord.
STEP 9: Leave the battery to charge
This is the point where you allow the batteries to charge by leaving them till they are fully charged. You can decide to stop charging the batteries once the manufacturer’s specified charging time has been met or you could just simply be on the lookout for the charge indicator on the battery charger which tells when the battery is fully charged.
STEP 10: When fully charged
At this point, your batteries are fully charged and are ready for use but wait, don’t just pull any cable from the batteries, you need to unplug the cables from the batteries systematically. First, you switch off the battery charger then you remove the battery charger negative cable first followed by the battery charger positive cable then you can remove the other cables. And your batteries are ready for use again.
Precautions to Take During Charging
Conclusion
Charging your two 12-volt batteries in series is not just like charging your phone batteries, they entail a few complex processes which have been explained above. You should also follow the steps above to safeguard your batteries and to get efficient productivity from your batteries.
Feel free to pass your comment on this tutorial and save your loved ones the stress and hassle of damaging their batteries and having to replace them only on the basis that they can’t properly charge the batteries.

